somehow i managed to convince "you know who" that our guest/ and studio bathroom on the third floor NEEDED to be updated. it was fully functional with a sink vanity, toilet, and shower... which had been part of "flipping" of the house in the early 2000's. back then they aded dormers to lift half of the attic ceiling and created a nice space up there but sadly neglecting any good style elements. it was so ugly that i never really thought much of the space... it was only used for occasional guests and my studio- which seemed a realm of it's own. the rest of the third floor remained painfully neglected for the past 8 years.
i had an epiphany recently that we needed to make something of this space- after all, our house isn't that big and it seemed that this space was being under utilized... perhaps if it were more inviting we would go up there more often. this is how the seed was planted...
the bathroom looked like this...


the tile was not my main focus... but i wanted something clean and simple. initially i wanted to do something like this:
but it is such a small bathroom and this type of design would better suit a larger space. i considered the simple white hexagonal tile:

but was concerned that it might clash with the beige toilet and fiberglass standing shower... so i scrapped that one. i found some leftover tile from our big 2007-8 renovation in the basement and brought up crema marfil tile with some clear glass squares and realized that keeping similar products from other bathrooms within the house would draw in this new new bathroom and create cohesiveness.... plus i am a fan of crema marfil which is already on the floor of my master BR. i bought this from the tile store and had enough glass squares left over from the last project- done!

now what to do for the vanity? i always have lots of ideas when i'm not renovating but when it is time to make decisions i become confused and uncertain. i did need to be cost conscious though. i started thinking about getting a campaign style vanity built- after all i am a big fan of this furniture. i found this etsy artist and ended up with a quote (without sink incl) of $1000- too much!
so i wasn't sure what to do... but suddenly i realized that I already owned the perfect vanity. it was the red campaign dresser that i bought at boomerangs about 10 months ago...( side note, whenever I see campaign furniture at a thrift store, I buy it). it was the perfect size for a small bathroom vanity. i looked up bathroom vanity diy dresser online and immediately realized this was totally do-able and would reduce the total bathroom expense considerably ....so i could splurge on other things ;)

i bought an inexpensive vessel sink and tall faucet from amazon and i was good to go. fortunately my super duper contractor BIL drilled the holes in the top of the dresser for me (i was stressed about ruining it). if you are looking to convert an old dresser into a bathroom vanity, here's how
moving on... this picture was on my "great ideas" pinterest board a while ago...i loved the vintage wallpaper and cute stair paint idea so much:

this got me thinking about my stairs and even doing 1 wall of the bathroom with wallpaper. i've been a fan of julia rothman for a while and love this look:

but i ended up getting obsessively sucked into the world of vintage wallpaper... spending hours and hours looking on-line, on etsy and ebay. these are the ones i really liked:


somehow i liked the idea of going with something from the 40's and 50's over something current...plus I love Hollywood regency-esque looks and vintage wallpaper would be better than modern for this instance.
the wallpaper on the stair risers was voted down by "someone" and so i settled on option 1 above for bathroom wallpaper- peach blossom was the name. it will go on the wall with the vanity/mirror/toilet. it is adorable!
so what color do i paint the dresser and what color should the rest of the walls be??? i'm still deciding. top contenders are pink and gray... but many other colors would work. the other walls will stay neutral, so we keep the focus on the wallpaper wall and all of the other sweet elements.
i had an epiphany recently that we needed to make something of this space- after all, our house isn't that big and it seemed that this space was being under utilized... perhaps if it were more inviting we would go up there more often. this is how the seed was planted...
the bathroom looked like this...

the tile was not my main focus... but i wanted something clean and simple. initially i wanted to do something like this:
 |
| via |
but it is such a small bathroom and this type of design would better suit a larger space. i considered the simple white hexagonal tile:
but was concerned that it might clash with the beige toilet and fiberglass standing shower... so i scrapped that one. i found some leftover tile from our big 2007-8 renovation in the basement and brought up crema marfil tile with some clear glass squares and realized that keeping similar products from other bathrooms within the house would draw in this new new bathroom and create cohesiveness.... plus i am a fan of crema marfil which is already on the floor of my master BR. i bought this from the tile store and had enough glass squares left over from the last project- done!

now what to do for the vanity? i always have lots of ideas when i'm not renovating but when it is time to make decisions i become confused and uncertain. i did need to be cost conscious though. i started thinking about getting a campaign style vanity built- after all i am a big fan of this furniture. i found this etsy artist and ended up with a quote (without sink incl) of $1000- too much!
 |
| via |
so i wasn't sure what to do... but suddenly i realized that I already owned the perfect vanity. it was the red campaign dresser that i bought at boomerangs about 10 months ago...( side note, whenever I see campaign furniture at a thrift store, I buy it). it was the perfect size for a small bathroom vanity. i looked up bathroom vanity diy dresser online and immediately realized this was totally do-able and would reduce the total bathroom expense considerably ....so i could splurge on other things ;)

i bought an inexpensive vessel sink and tall faucet from amazon and i was good to go. fortunately my super duper contractor BIL drilled the holes in the top of the dresser for me (i was stressed about ruining it). if you are looking to convert an old dresser into a bathroom vanity, here's how
moving on... this picture was on my "great ideas" pinterest board a while ago...i loved the vintage wallpaper and cute stair paint idea so much:
this got me thinking about my stairs and even doing 1 wall of the bathroom with wallpaper. i've been a fan of julia rothman for a while and love this look:
but i ended up getting obsessively sucked into the world of vintage wallpaper... spending hours and hours looking on-line, on etsy and ebay. these are the ones i really liked:
somehow i liked the idea of going with something from the 40's and 50's over something current...plus I love Hollywood regency-esque looks and vintage wallpaper would be better than modern for this instance.
the wallpaper on the stair risers was voted down by "someone" and so i settled on option 1 above for bathroom wallpaper- peach blossom was the name. it will go on the wall with the vanity/mirror/toilet. it is adorable!
so what color do i paint the dresser and what color should the rest of the walls be??? i'm still deciding. top contenders are pink and gray... but many other colors would work. the other walls will stay neutral, so we keep the focus on the wallpaper wall and all of the other sweet elements.
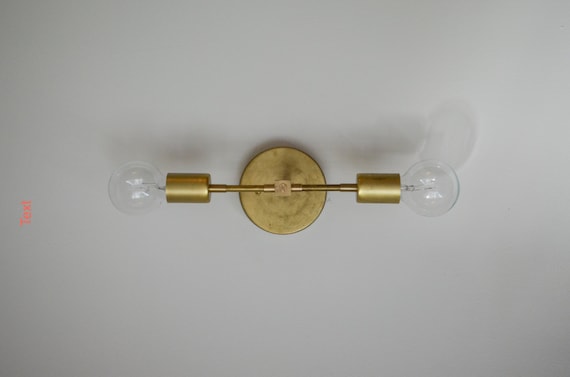
in looking for a lighting fixture to replace the boring one I checked out school house lighting first, recently a friend used their stuff as loved it, but ended up with something more simple than I usually go for but would complement the space perfectly. it will be mounted horizontally above the mirror.
just today i stopped by homegoods just to see if they had a simple mirror for over the vanity. i got lucky and found 2 possibilities.... a square one and a tall rectangular. Although i like the way the square one looks alone, the tall one looks better in the space and i look skinnier in it... which tells you the clear winner.

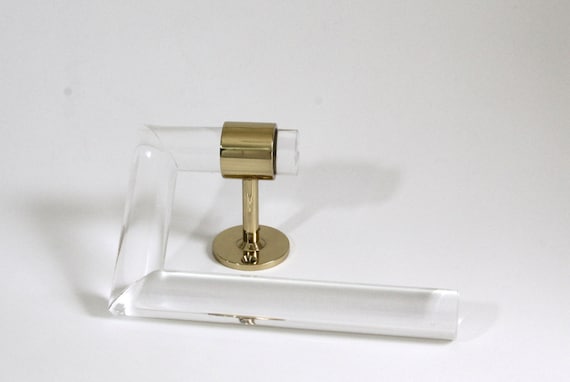
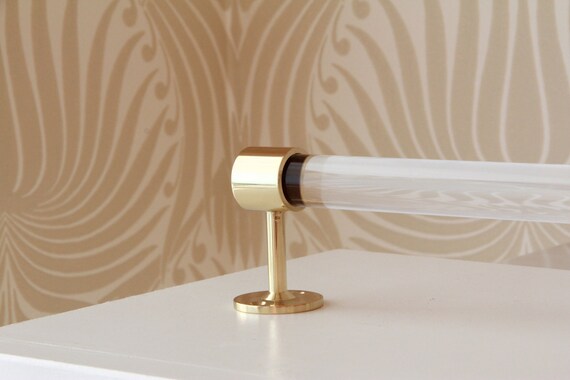
as far as towel rings and bars, toilet roll holders etc I decided to embrace my love of lucite and go with vintage items bought on ebay:


if you have unlimited cash, these are the ones i was drooling over:
stay tuned for bathroom renovation updates and photos of the final result!
xo
so
just today i stopped by homegoods just to see if they had a simple mirror for over the vanity. i got lucky and found 2 possibilities.... a square one and a tall rectangular. Although i like the way the square one looks alone, the tall one looks better in the space and i look skinnier in it... which tells you the clear winner.

as far as towel rings and bars, toilet roll holders etc I decided to embrace my love of lucite and go with vintage items bought on ebay:
if you have unlimited cash, these are the ones i was drooling over:
 |
| via |
 |
| via |
stay tuned for bathroom renovation updates and photos of the final result!
xo
so
No comments:
Post a Comment